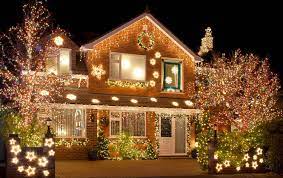
Let’s face it—untangling holiday lights might feel like the first step in a festive obstacle course. From mayhem to holiday splendor in the blink of an eye with some forethought and expert advice. Finding our additional info for latest update!
Get a feel for your own personal power limits first. The electrical circuits in your house have a limited capacity. Up to 1,440 watts can be accommodated by a conventional 15-amp circuit, while about 1,920 watts can be used with a 20-amp circuit. Crossing the bridge? Embrace the arrival of blown fuses or that dreaded electrician. Keep everything bright and cheery by distributing the wattage love across many outlets and circuits.
Linking up is the next topic. Even if it’s tempting to make a giant holiday necklace out of all your lights, resist the urge. The use of older lights necessitates the use of three strings per outlet. You can daisy-chain more modern LED strands and they require less power, but you should still read the label to make sure.
Now, we may discuss the layout. Do some basic planning before you begin securing anything to the roof. Locate the gutters, windows, and bushes. Determine the placement of all power outlets, plan your color scheme, and double-check that extension cords won’t serve as trip wires.
Check all of the lights before you hang a single one. Finding out halfway through the setup that it is dark—after it has already been placed on the roof—is the best way to dampen the Christmas enthusiasm.
Lastly, go easy on the ladder. Be cautious, go slowly, and check if it’s on solid ground. Believe us when we say that your Christmas display ought to be the talk of the town, not the subject of a blooper film.
If you stick to these instructions, your street setup will be the safest and brightest in town; Rudolph would be proud.